
Blog · Guide · · 5 min read
Turn a small box in your office into a WireGuard concentrator
One Ubuntu machine becomes the place your laptops connect to, with the office's internet line as their way out. Nine steps from a bare box to a connected device, with screenshots.
A concentrator is the one place your remote devices connect to. Put it on a box you own, in the office, and three things follow: laptops reach the office network directly, their internet can leave through the office line (so anything that allow-lists your office IP just works), and there is no cloud VM to pay for or patch.
This guide takes a machine from a fresh Ubuntu install to a device connected through it. Every screenshot is from a real run of these steps; public addresses and one-time tokens in them are masked.
What you need
- A machine that runs Ubuntu 24.04 LTS. A mini PC, a NUC or a spare 1U server, x86-64 or ARM64. It does not need to be big. For the screenshots we used a small cloud instance with 2 CPU cores and 2 GB of memory, standing in for the box; the steps on a mini PC are the same.
- One network port connected to your office network, with internet access.
- A way in from outside on UDP port 51820. Either the box has a public address, or you can add a port forward on your router: UDP 51820 to the box. Nothing else needs opening, not even SSH.
- A Weft organisation. The free trial covers this whole guide.
1. Name the site
In the console, open Add a Linux node. Give the box a site id, choose already runs Ubuntu, and press Continue.

2. Run one command on the box
The console shows a single command. Copy it and run it on the machine, as a user who can sudo.
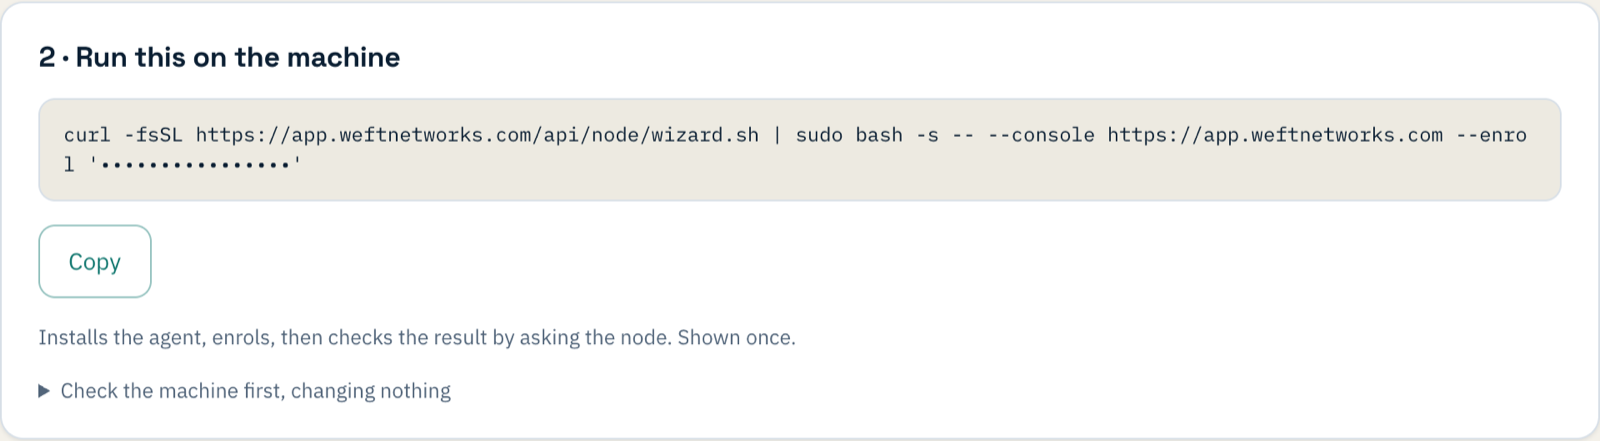
The command checks the machine first (kernel WireGuard, the clock, the architecture, whether it can reach Weft), then installs WireGuard and FRR, installs the agent after checking it against its published checksum, and enrols. The box generates its own keys; only the public halves ever leave it. If you want to see the checks without changing anything, the card has a check the machine first command that does just that.
If the command stops with an error before it reaches Weft, the token has not been used. Fix what it names and run the same command again.
3. Check it has joined
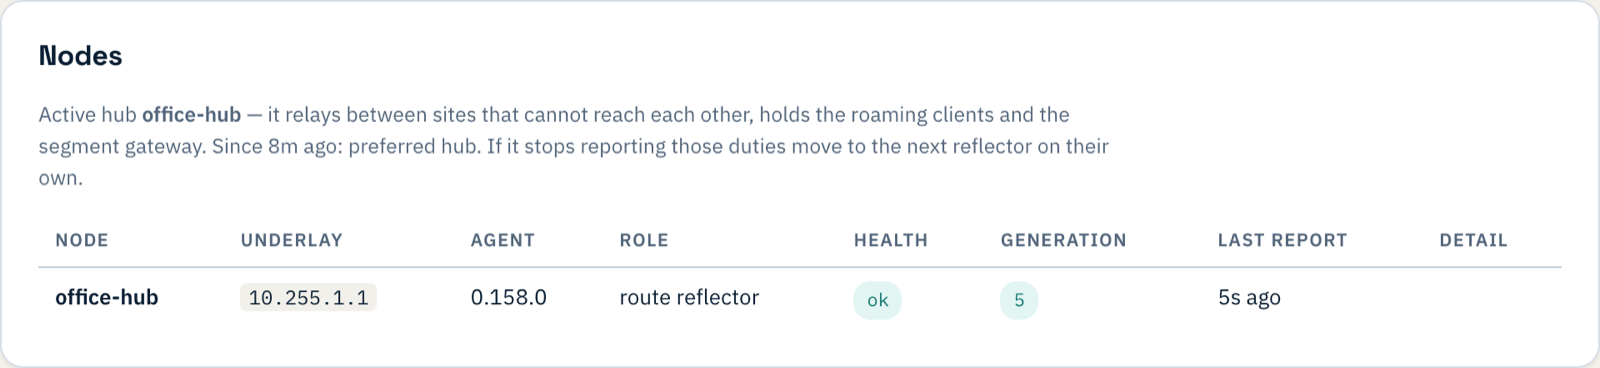
Within a minute the box appears on the Overview with its agent version and a health of ok.
4. Tell it which port faces the internet
Open Sites and then the new site. Under Uplinks, set WAN 1 port to the interface the box uses to reach the internet, and save. The list shows each interface with its address, and greys out the ones Weft itself created.
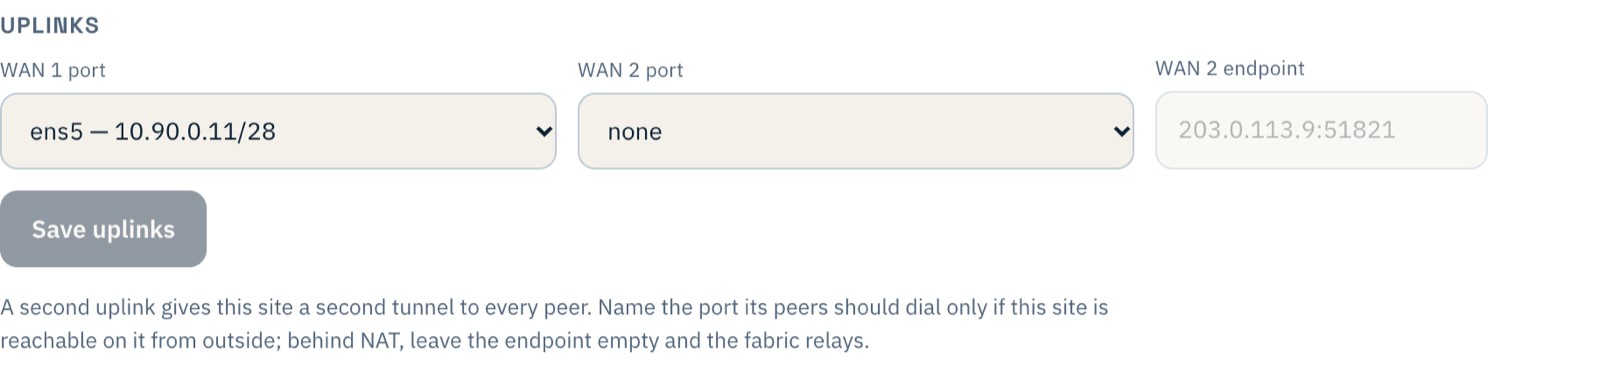
enp1s0 or eno1. Leave WAN 2 alone unless the box has a second internet line.5. Make it the hub
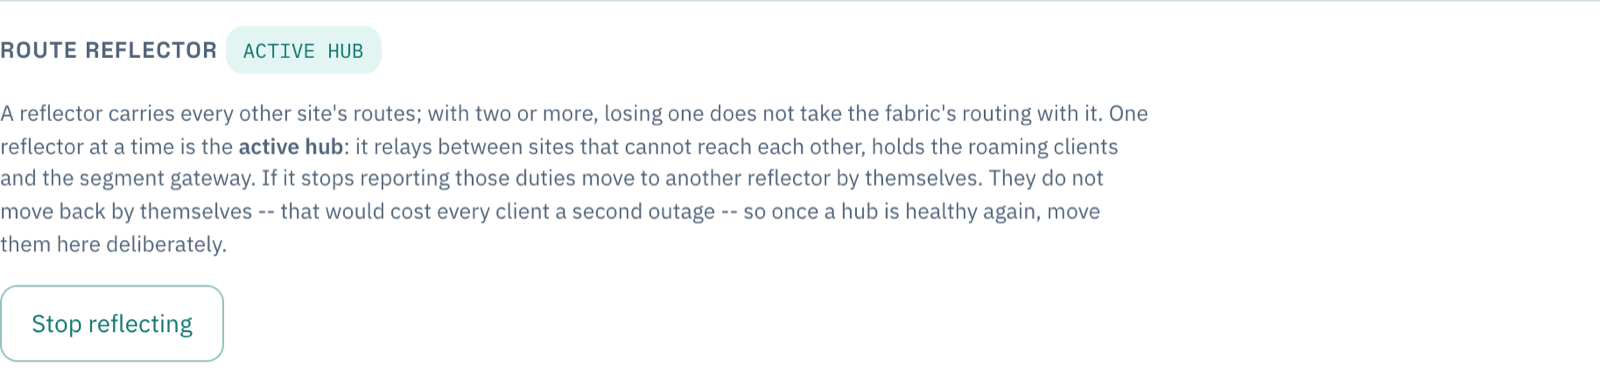
Further down the same page, under Route reflector, press Make a reflector. The first reflector in an organisation becomes the active hub: the place roaming devices connect to.
6. Tell devices where to find it
Open Settings and set client_hub_endpoint to the address devices should dial, with the port: your office's public IP, or a DNS name that points at it, followed by :51820.

If the box sits behind your router, this is when to add the port forward: UDP 51820 on the router to the box's address. Weft cannot see your router, so this is the one step it cannot check for you, and it is the first thing to look at if devices never connect.
7. Send devices' internet through the office
This step is optional. Skip it if you only want devices to reach the office network (a split tunnel).
For full tunnel, where everything a laptop sends goes through the office, the fabric needs a way out to the internet. Back on the site, under Egress node, press Make this the egress node. The box then takes devices' internet traffic out through its WAN port, translated to its own address.
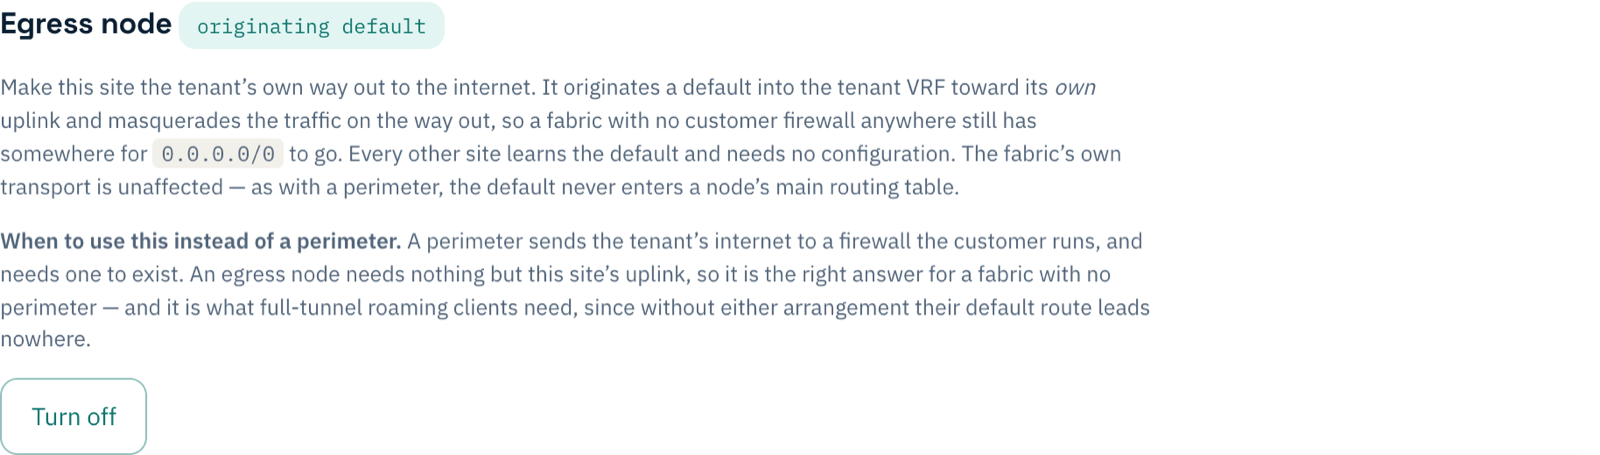
From the outside, a full-tunnel laptop's traffic now looks as if it comes from the office. That is useful when a supplier or a cloud service only accepts connections from your office IP.
8. Invite a device
Open Downloads. Under Invite a device, name the device, choose a tunnel, and press Invite.
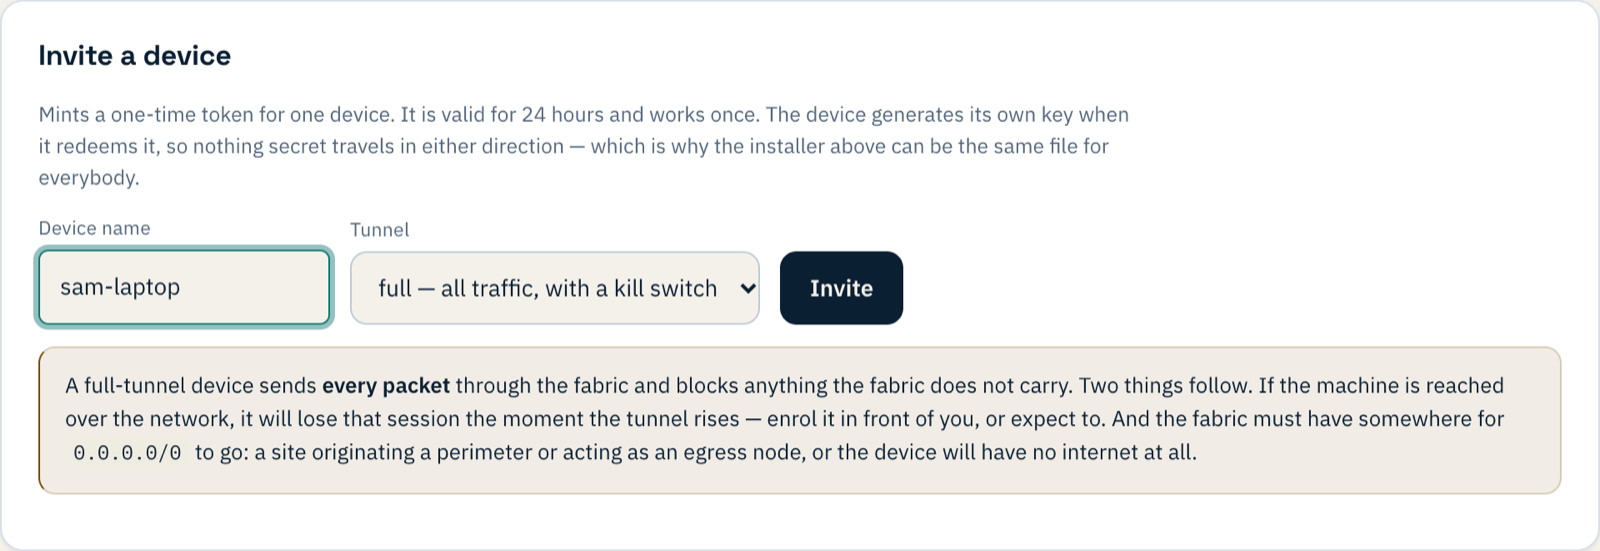
You get a one-time invitation, valid for 24 hours. The person installs the Weft app for macOS or Windows from the same page, pastes the invitation and presses Join. The device makes its own key; no configuration file with a private key is ever sent. For a Linux machine, or anything that will not run the app, the Configuration only card on the same page produces a standard WireGuard file whose key is generated in your browser.
9. Check the device is connected
The Clients page shows each device, where it is connected and when it was last seen.

If something does not work
| What you see | What it means |
|---|---|
| Inviting a device says the organisation has no hub | Step 5 is not done: make the box a reflector. |
Inviting a device says client_hub_endpoint gives no address | Step 6 is not done: set the address devices should dial. |
| "Has no uplink interface recorded" when making the egress node | Step 4 is not done: choose the WAN 1 port. |
| The device says it is connecting but never connects | UDP 51820 is not reaching the box. Check the router's port forward, and any firewall in front of it. |
| A full-tunnel device connects but has no internet | Nothing is the way out: do step 7, or point the organisation at your own firewall (a perimeter) instead. |
What you have now
One box in the office that your laptops connect to, that knows every route in your network, and that can be the office's internet exit for anyone working away. When you add a second office, enrol a box there the same way: the sites find each other, and devices keep connecting to the hub. The next guide does exactly that, then pulls the plug on the first office to see what remote staff go through. For the wider picture, see replacing the remote-access VPN and how Weft works.